
Sky Armor Exteriors Woodbury, Minnesota
If the garage is the first thing you see from the street and the front door sits back in shadow, start with stone at the porch. Two column bases can frame the entrance without changing the entire front. If the house already has a strong entry, a low stone band can tie the garage and living space together.
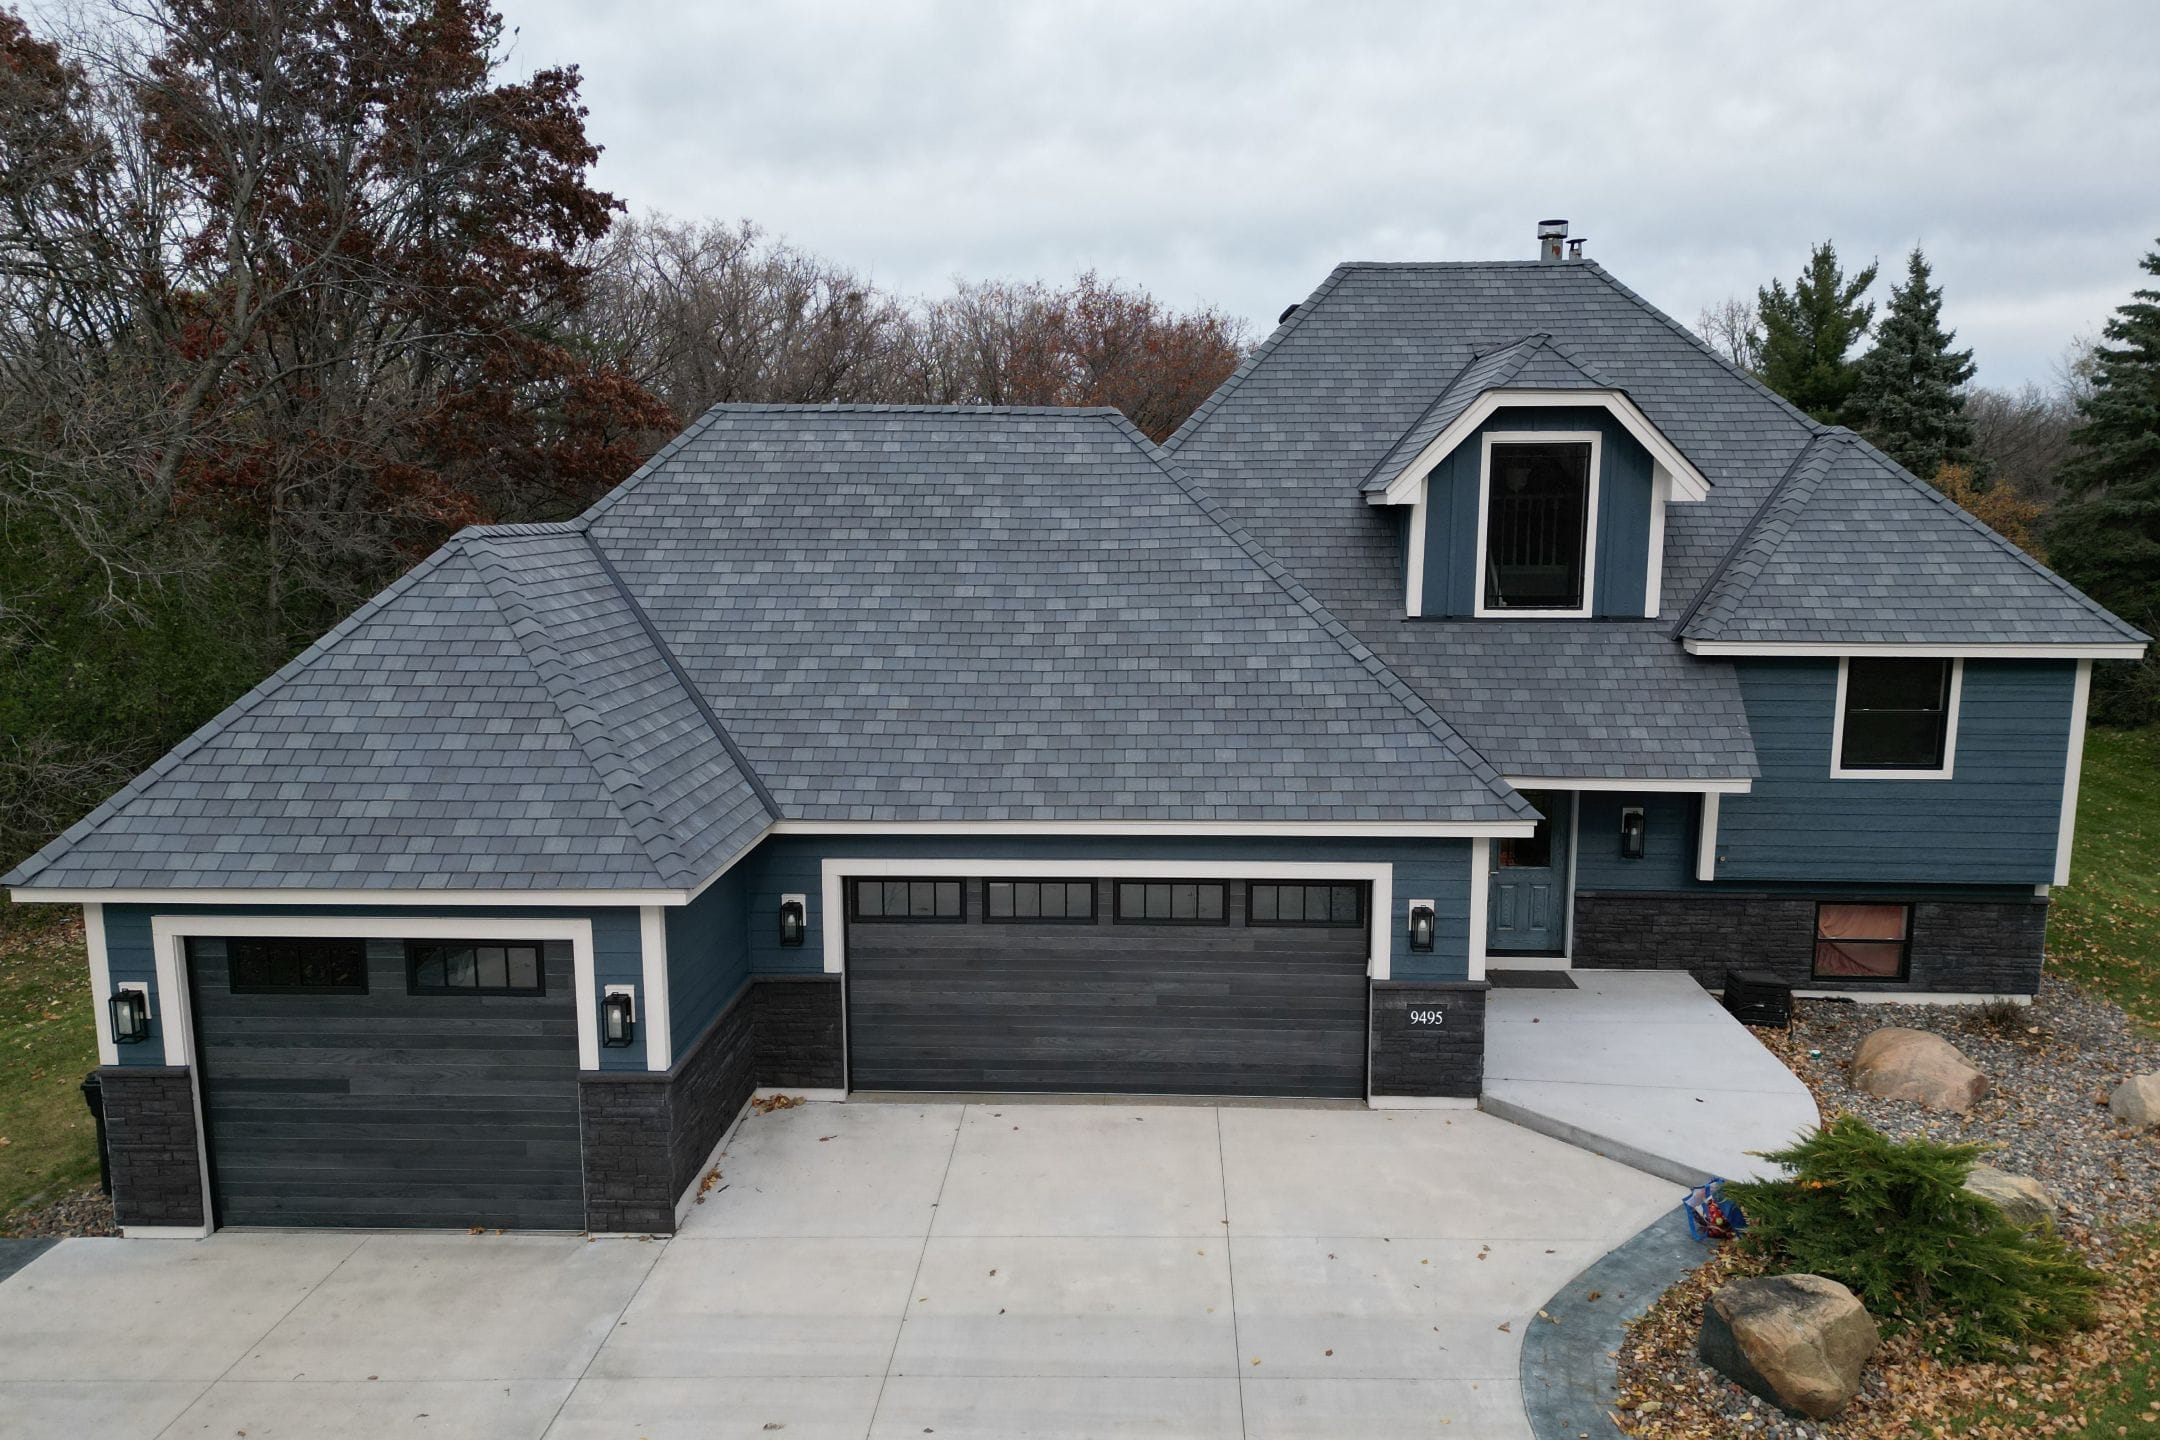
Where should stone go on the front of your house?
A custom-looking exterior usually starts with a clear stopping point. A porch post has four faces. A garage pier has two edges. A wall that turns back toward the front door gives stone a corner to wrap. Use one of those features to set the boundary before you choose a stone color.
Design study
One front elevation, three ways to use stone
Gold marks the stone. The house, window heights and garage opening stay the same in every drawing.


How high should stone wainscoting go? Should it wrap the corner?
Use the window sills, porch landing and garage lights as reference points. Tape two possible top lines on the siding, then walk back to the curb. A narrow strip of siding trapped between a cap and a window usually looks awkward. Move the line and look again. Use the more convincing height as the starting point for a layout that fits the chosen product and its clearances.
Walk up the driveway at an angle, too. A band that looks finished from the street can expose a thin edge from the side. Where the architecture allows, carry the stone around the outside corner to a natural stop, such as the inside corner where the garage meets the house. Have the return and its cap shown on the estimate.

Versetta Stone, Evolve Stone or Silvermine Stone?
All three are manufactured, mortarless veneers. They create a stone face on the wall using different materials and attachment details. The shortlist gets easier when you know whether you’re finishing a long wall, a narrow entry or a four-sided porch base.
| Design priority | System to sample and why |
|---|---|
| A band beneath lap siding | Versetta Stone. Compare the pronounced layers in Ledgestone with the more orderly face of Tight-Cut. View the cap beside the panel so you can judge the finished top edge. |
| A narrow entry wall or return | Evolve Stone. District View’s smaller individual pieces give you more room for the pattern to show. For a broad wall, compare it with the larger individual faces in Georgetown Run. |
| Stone around porch columns | Silvermine Stone. Belterra pairs ledgestone-style panels with a dedicated pillar system and caps. Its Modern collection offers a geometric face and a smooth, chamfered sill. |
Versetta Stone for a continuous siding accent
Versetta uses fiber-reinforced concrete panels with a fastening flange and a built-in drainage space. On a garage façade, compare a full panel and a corner piece together. Then hold the proposed light fixture against the matching mounting block. A lantern with a wide backplate needs a flat, well-proportioned landing. Finalizing that detail before ordering keeps the light centered and the courses clean. See Versetta’s profiles and coordinating sills and light boxes.
Evolve Stone for a smaller-scale pattern
Evolve’s lightweight pieces have color throughout. The standard exterior installation uses stainless-steel finish nails over an approved wood substrate, with a water-resistive barrier and a separate rainscreen behind the stone. For a narrow pier, lay out the actual width using a few District View pieces, including the corner. It’s a quick way to see how many full faces will fit across the front. View District View or compare Georgetown Run.
Silvermine Stone for a finished column base
Silvermine casts its panels from cement and lightweight aggregate with metal flashing embedded in each panel. The Belterra pillar system wraps a prepared frame. Its stone wrap is decorative; the post inside carries the porch load. Look at the split cap for a base wrapped around an existing post, and ask to see where the joint will face the walk. Silvermine recommends a water-resistive barrier over wood sheathing. Explore Belterra pillar and cap photos, the Modern profile and Silvermine’s wall preparation guidance.


What stone color works with your new siding?

With warm white or cream lap siding, start with a taupe-gray ledgestone. Look for a warm tone that also appears in your roof, front door or existing brick. A strongly patterned brick usually pairs more comfortably with a quieter stone. If you’re considering prefinished lap siding, bring the actual board to the stone selection. Our Woodbury Diamond Kote siding guide shows more ways to coordinate siding, trim and accents.
With charcoal board and batten, try a pale, limestone-look face with fewer color changes. The vertical battens already make a strong pattern. A broad stone face gives the eye a place to rest, provided the wall is wide enough to show the pieces. Stand both samples upright outdoors. View them together in midday light and in the shade beside your entry door before choosing.
Can you replace just the front siding with stone in Minnesota?
Yes, a partial replacement can work when the affected wall has a suitable backing and the new drainage details can connect to the siding you’re keeping. For a typical vinyl-sided wall, plan to remove siding in the work area and open enough of the adjacent finish to make those connections. The sheathing is the structural panel underneath. Its condition, the depth of the new stone, and the positions of windows, outlets and lights all affect the scope.
At Sky Armor, we inspect the sheathing, moisture barrier and flashing details and document what we find. For a Woodbury siding project, the city calls for a permit and inspections, including flashing at openings and horizontal flashing at stone or masonry. If a porch light moves, coordinate the fixture and inspection before closing the wall. Read Woodbury’s residential siding requirements (PDF).
Where does snowmelt go when siding meets stone?
Follow a drop of water behind the upper siding. In the Evolve example below, the water-resistive barrier overlaps the metal flashing so the drop can run outward over the stone sill. Below that joint, the rainscreen leaves space behind the veneer for drainage and drying. The visible cap finishes the top of the stone. The hidden flashing manages water reaching the joint from above.

At the bottom of a wall, check the chosen product’s clearance from the driveway, mulch and soil. For example, Westlake specifies at least 2 inches above concrete or paving and 4 inches above soil or mulch for Versetta Stone. Those numbers are specific to Versetta. Look at the highest point of a sloped driveway when reviewing the layout. See Versetta’s clearance guidance.

What affects stone veneer cost in Woodbury, and can it add resale value?
Compare a 60-square-foot rectangle on a garage wall with 60 square feet distributed over several porch bases. The wall can use long runs of field pieces. Each base introduces four corners, short cuts and a cap fitted around a post. Even at the same square footage, the trim, accessories and labor can differ substantially. Existing siding removal, sheathing repairs, access and the number of light or outlet blocks also affect the installed price.
What should a stone accent estimate include?
- A drawing or marked-up photo showing the top line, which sides wrap, and exactly where the stone stops.
- Materials and quantities listing the brand, profile, color, square feet of flats, lengths of corners and sills, and the number of caps or mounting blocks.
- Wall preparation covering tear-off, inspection, how sheathing repairs will be priced, and which barrier and drainage details are included.
- Finish work and permits identifying who handles the fixtures, ties into the remaining siding, arranges inspections and removes debris.
Planning new siding with stone accents?
Sky Armor Exteriors plans and installs stone veneer accents as part of siding projects in Woodbury and the Twin Cities. Bring a straight-on photo of your home and one taken from the driveway. Tell us which feature you want people to notice first. We can use those views to discuss placement, compare finishes and prepare an itemized estimate.